How exam management work in Classunify Institute Management ERP:
There are certain procedure you will have to follow-
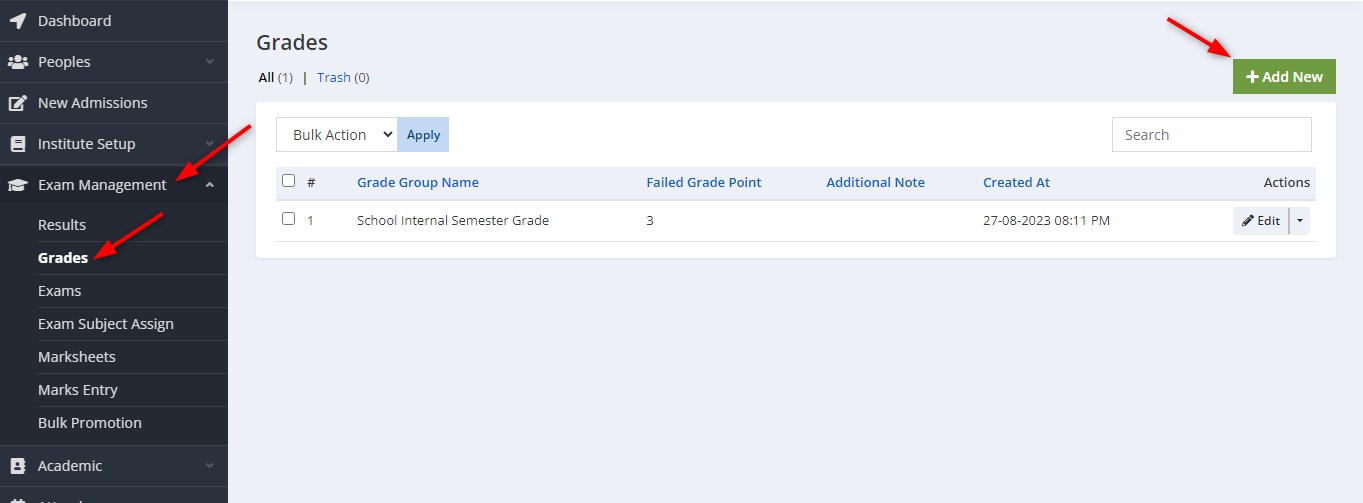
At first, you have to add grades.
To add grade, simply follow these steps:
1. From the side menu bar,click on Exam Management > Grades > Add new.
2. Fill up all the details and click on Save.
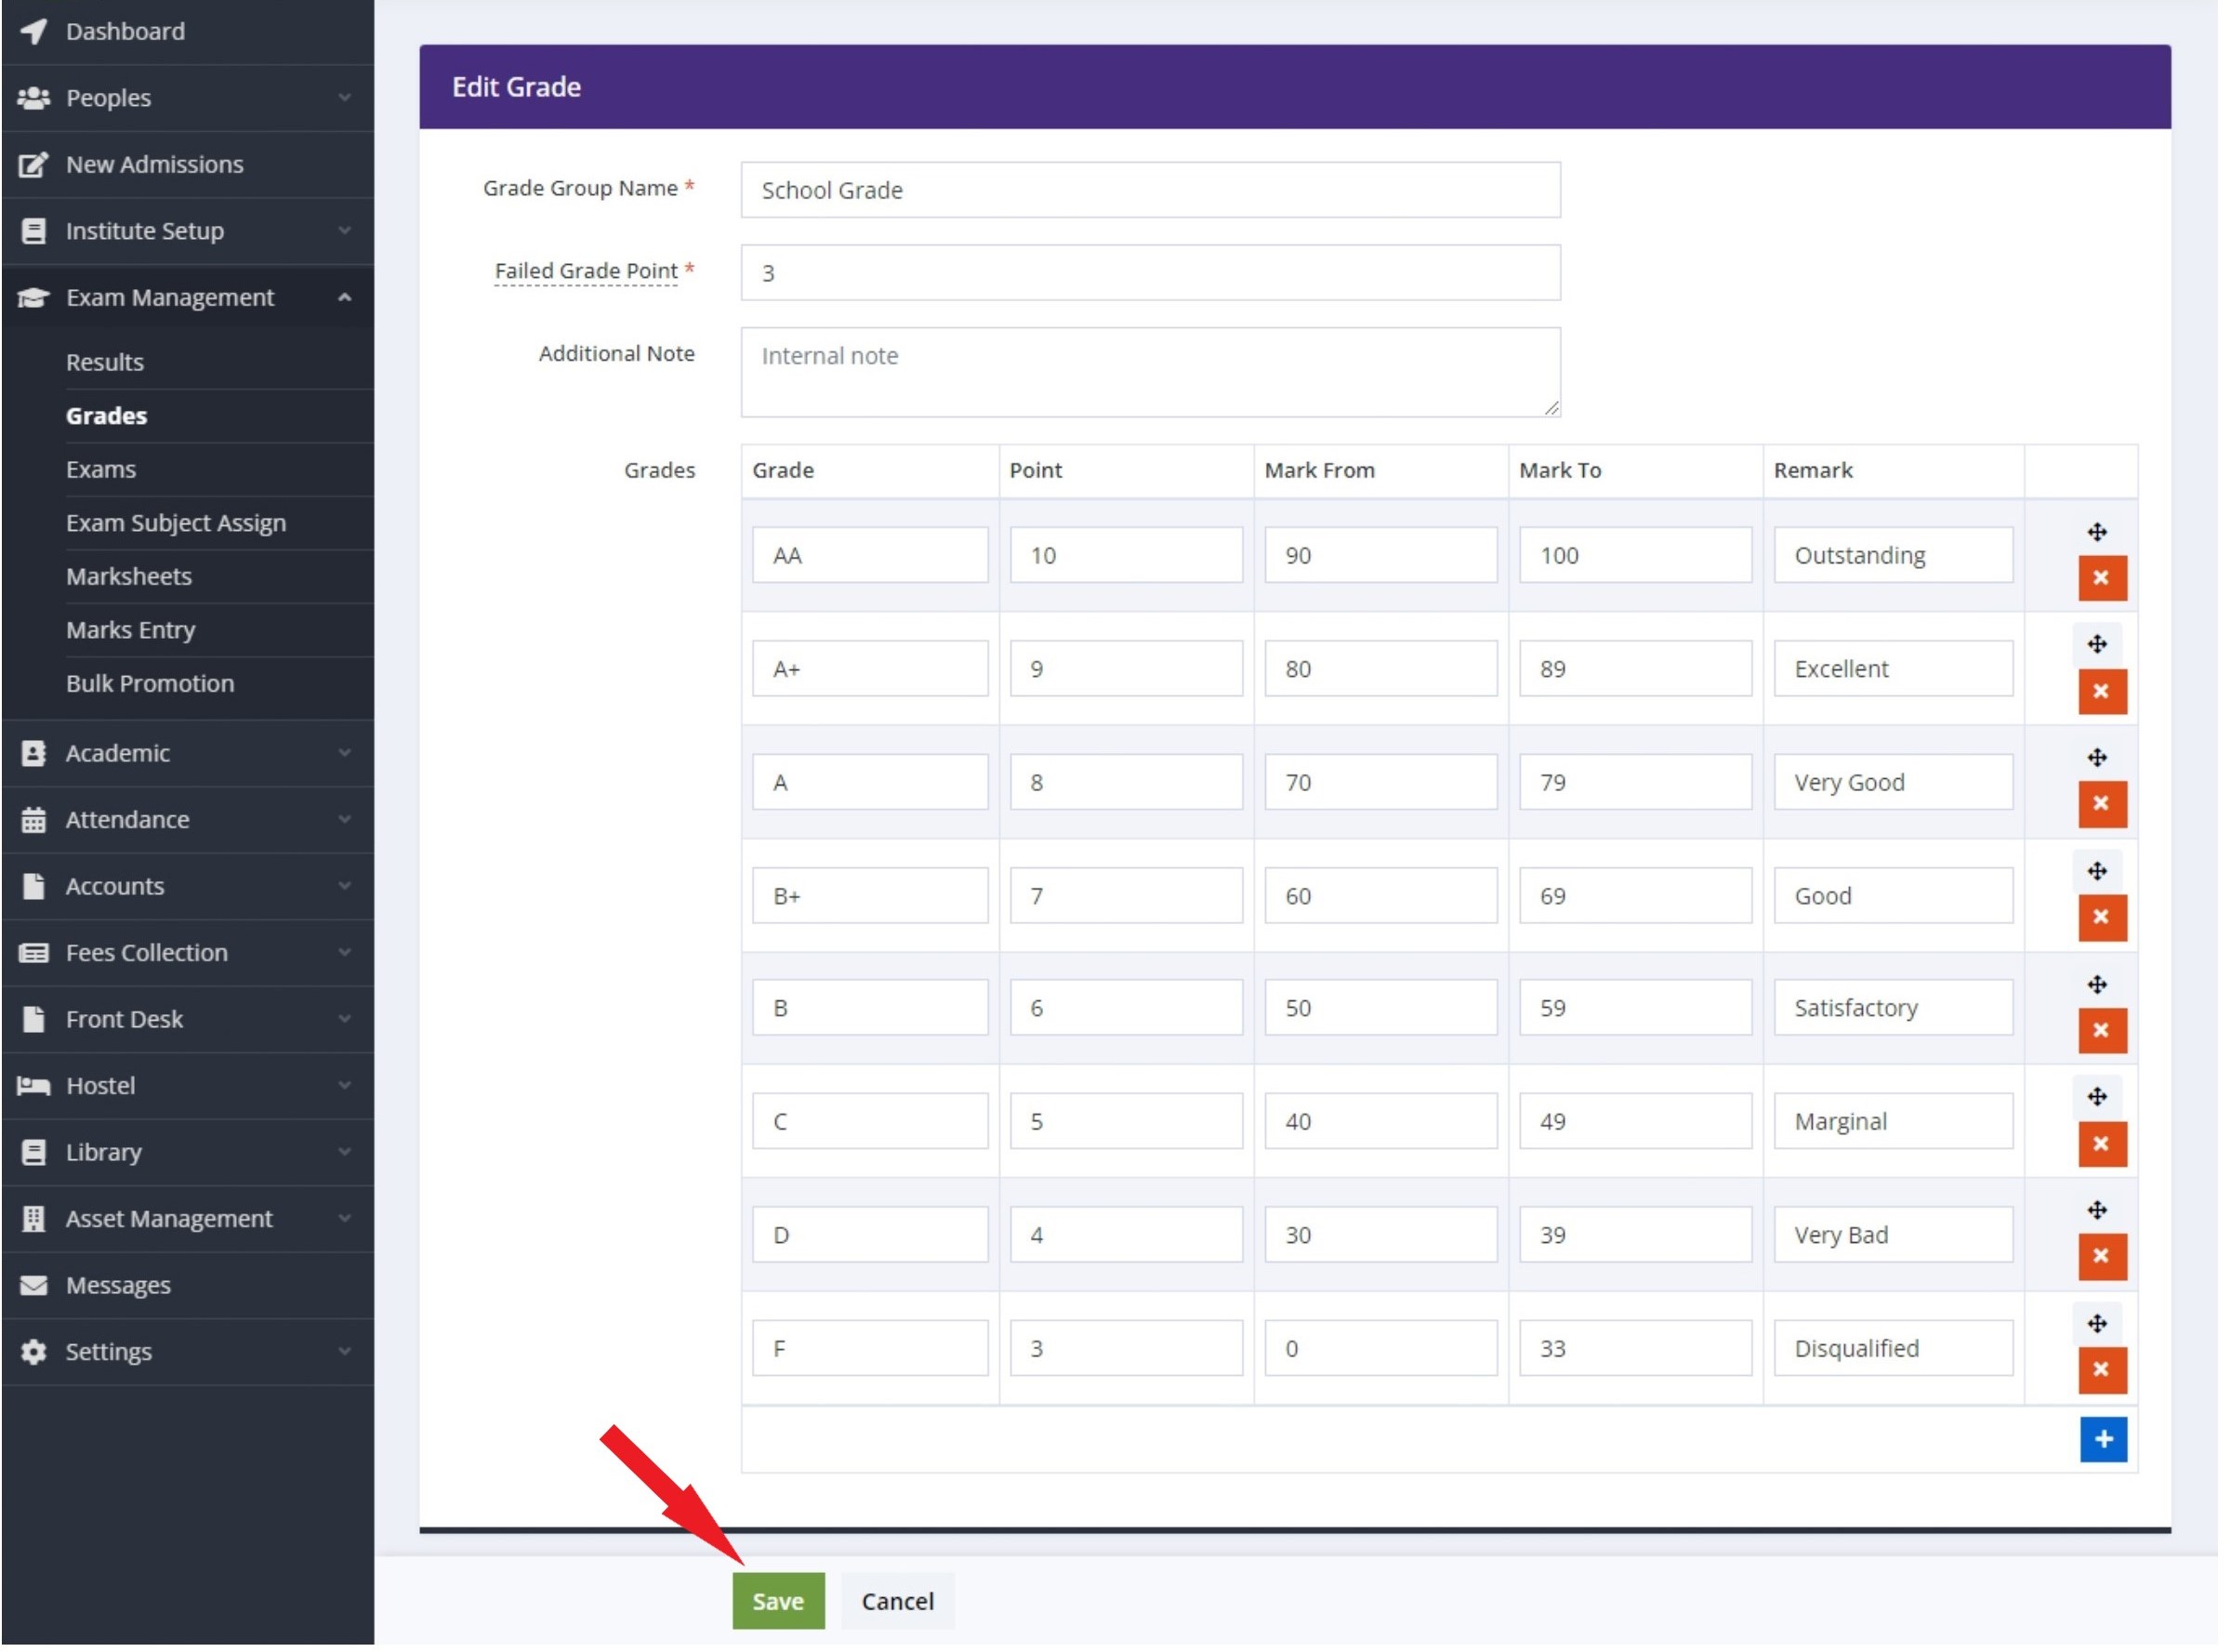
This is a sample picture given above. You can fill up the details according to your school's format.
3. You have successfully added grade.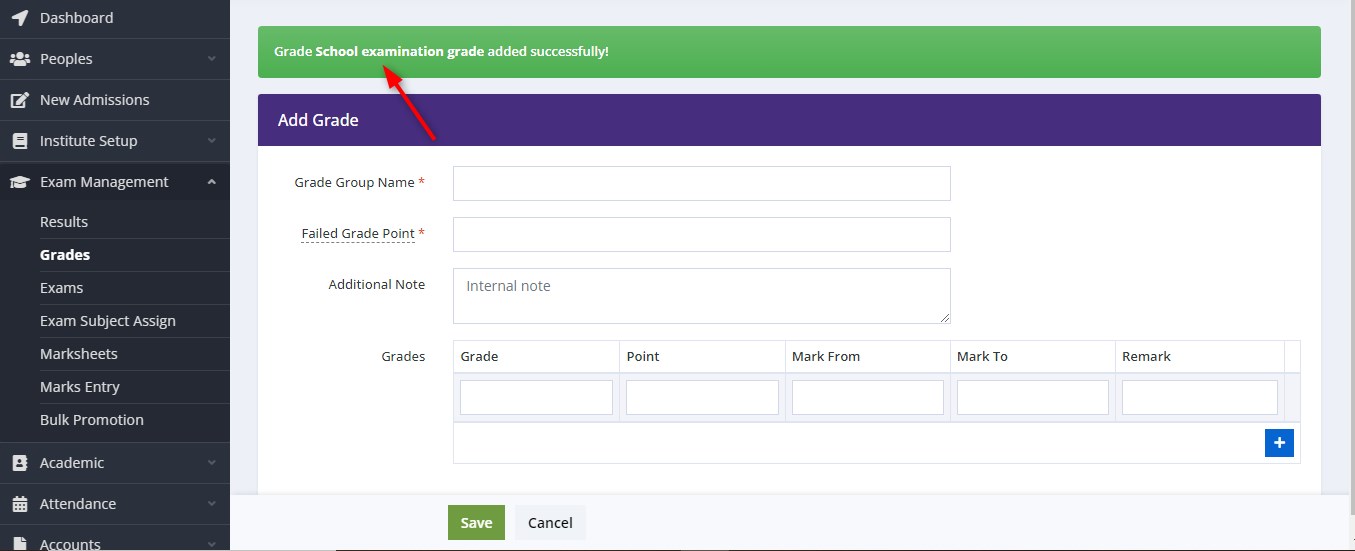
Secondly, you have to add an exam.
To add an exam, simply follow these steps:
1. In the side menu bar,click on Exam Management > Exams > Add new. 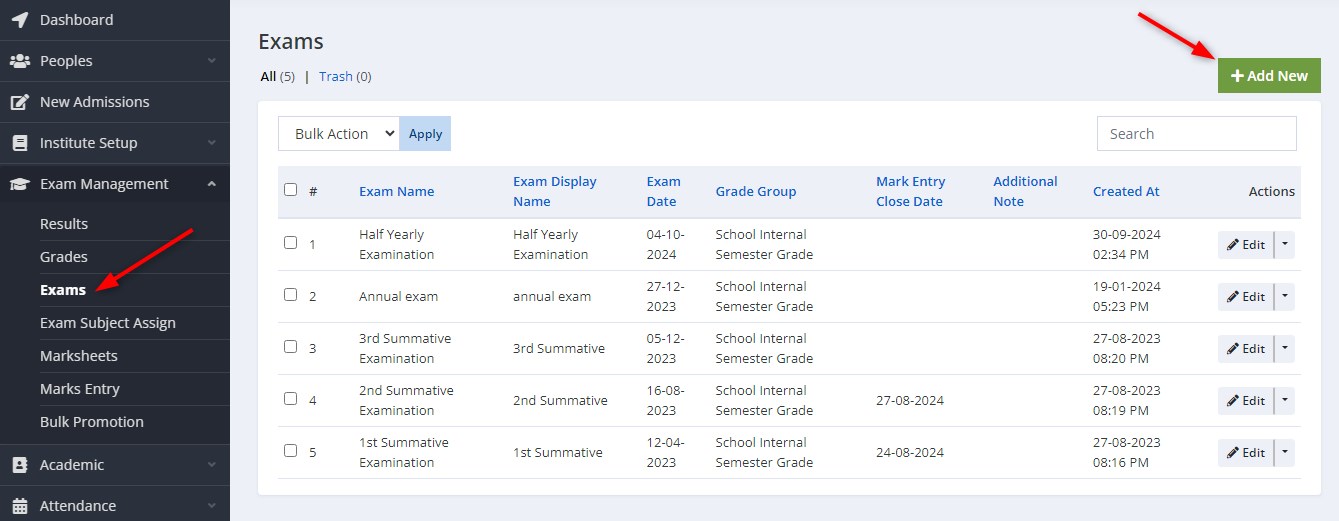
2. Fill up the details and click on Save.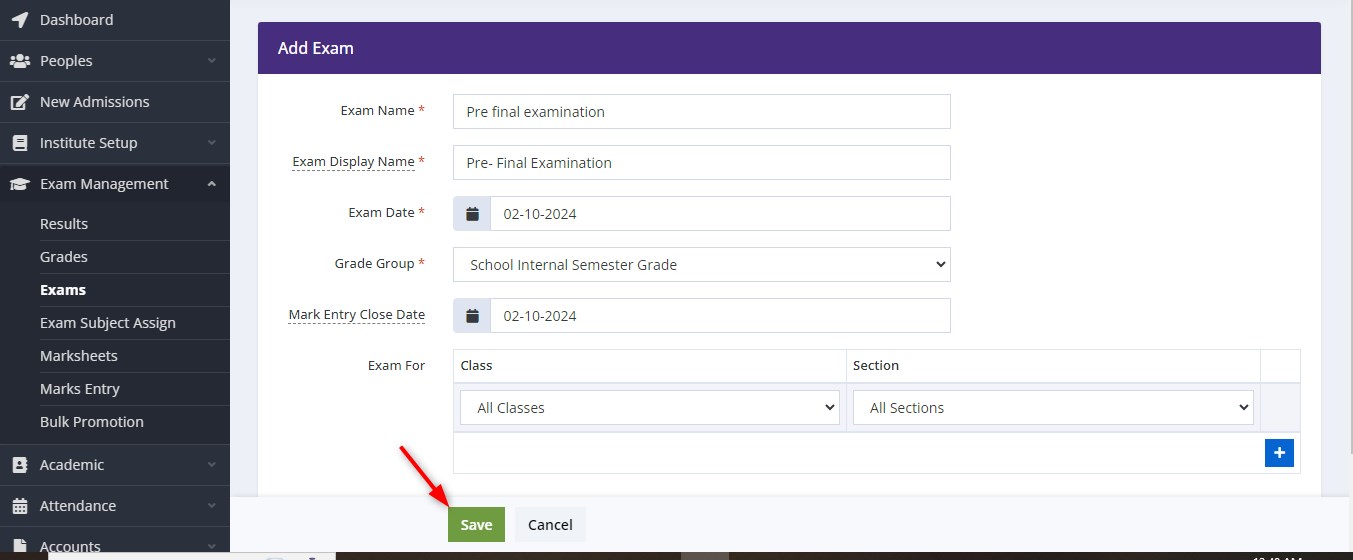
"Mark Entry Close Date" are only for teachers.After this date, no teacher will be able to enter marks. However, admin can update marks.
3. You have successfully added an exam.
Thirdly, you will have to assign subject.
To assign subject, simply follow these steps:
1. In the side menu bar,click on Exam Management > Exam Subject Assign > Add new.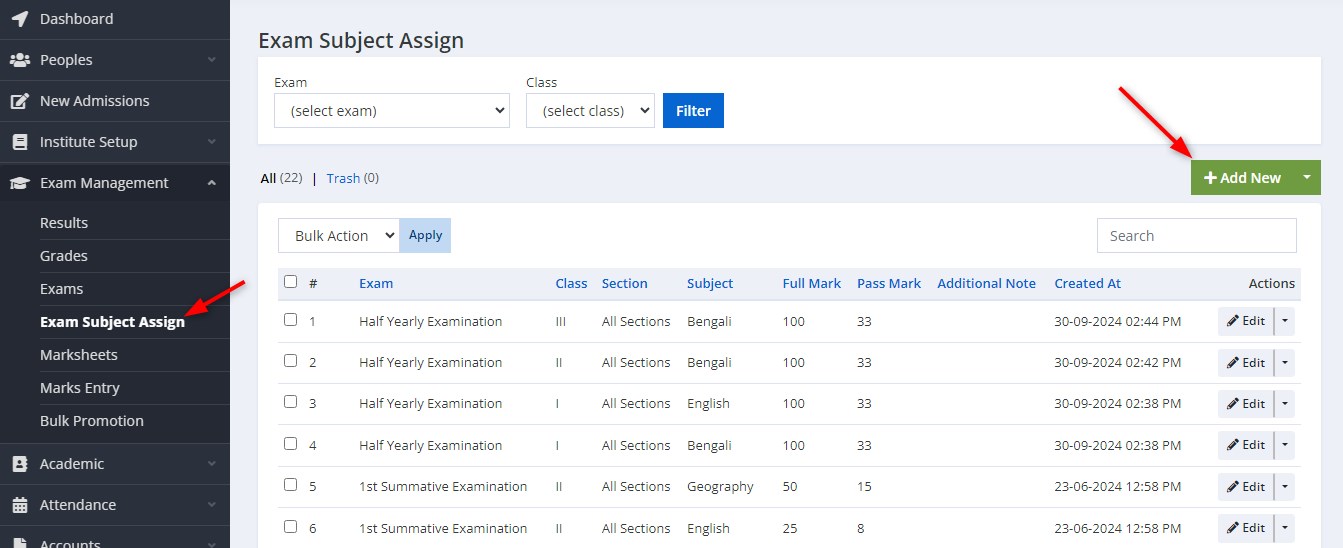
2. Fill up the details and click on Save.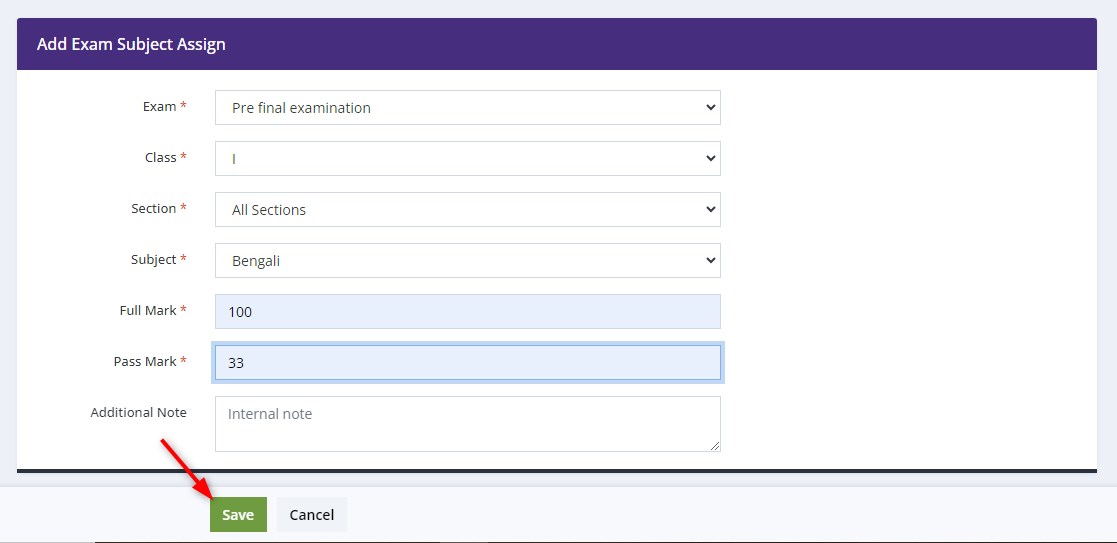
This is a sample picture given above. You can fill up the details according to your school's format.
3. You have successfully assigned a subject.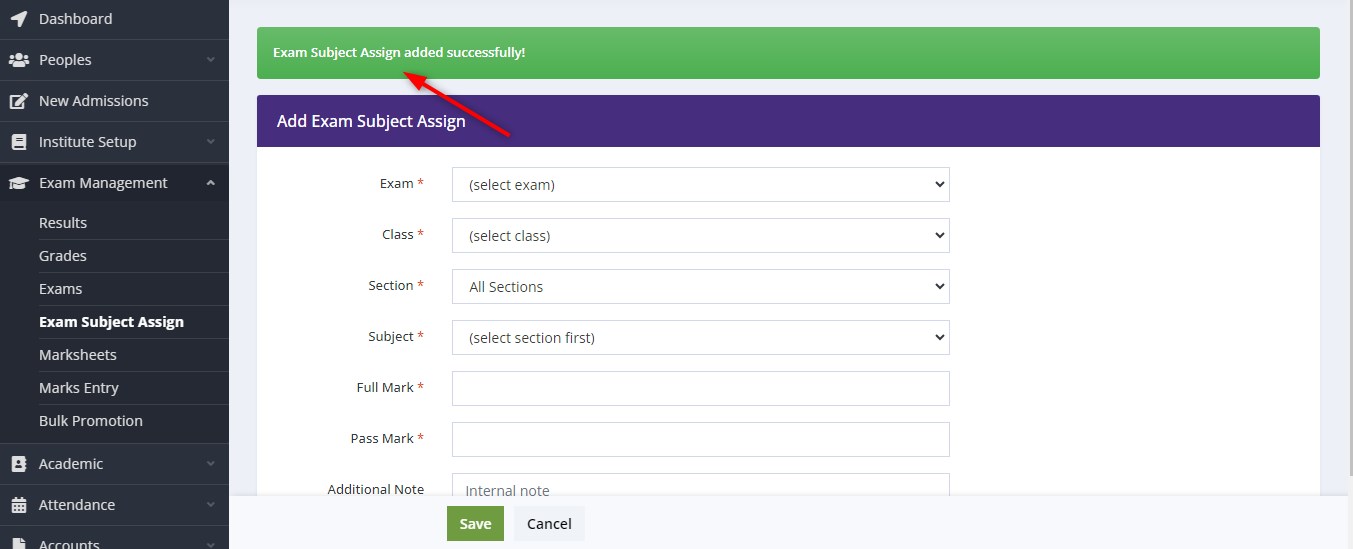
Fourthly, you will have to add marksheet.
To add marksheet, follow these steps:
1. In the side menu bar,click on Exam Management > Marksheets > Add new.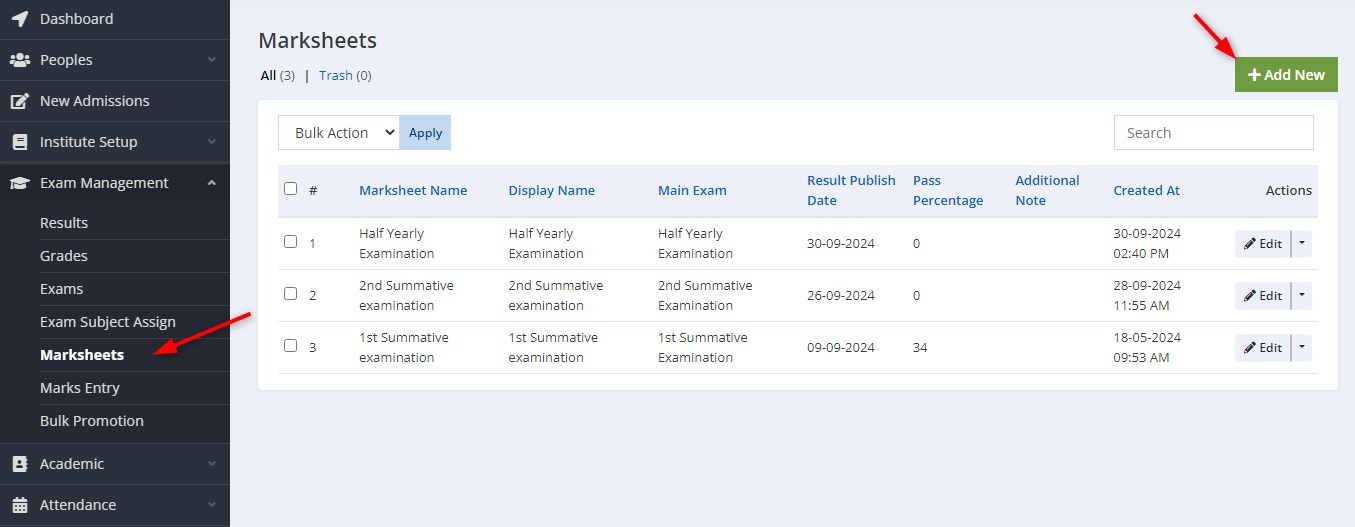
2. Fill up the details and click on Save.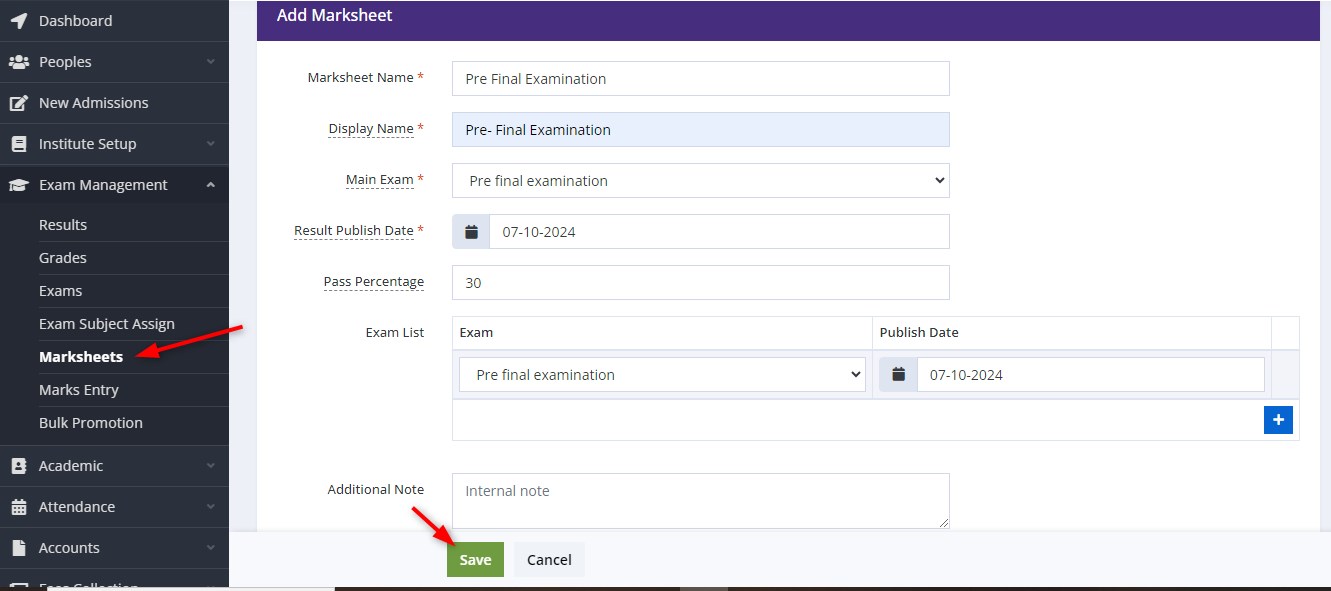
This is a sample picture given above. You can fill up the details according to your school's format. "The 'Result Publish Date" is the date when the result will be automatically published, allowing parents to view it. The result will not be available before this specified date.
3. Now, you have successfully added marksheet.
Fifthly, you have to add marks.
To add marks, simply follow the steps:
In the side menu bar,click on Exam Management > Mark Entry.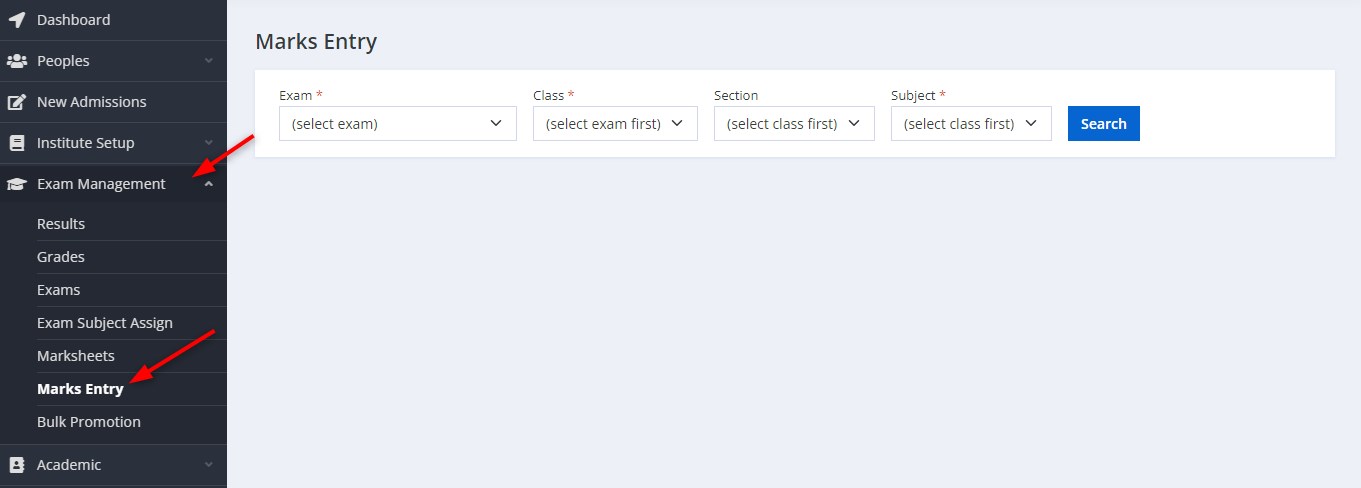
2. Fill up the details and click on Search.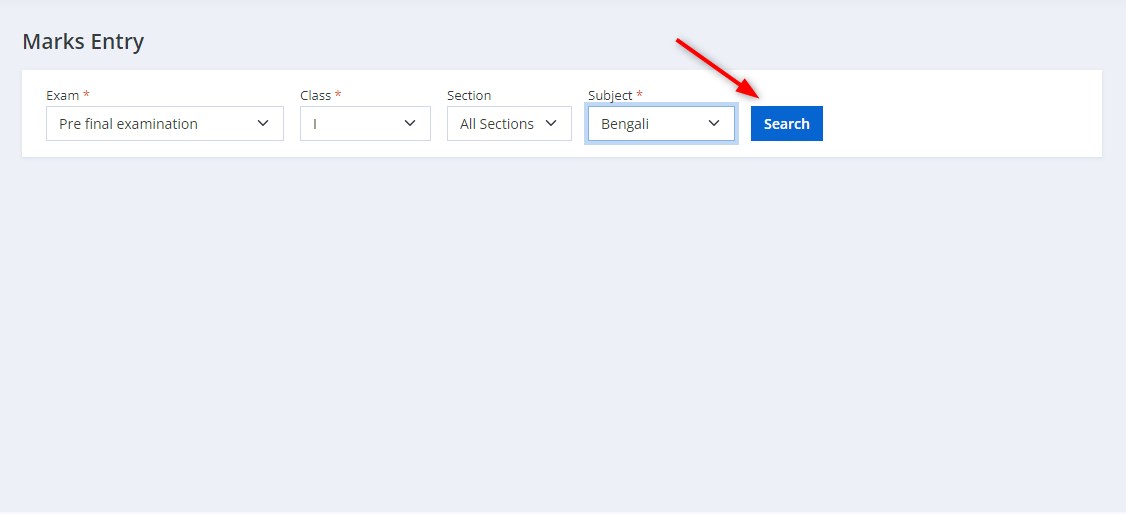
3. Now, fill up the marks and click the and click on Save. 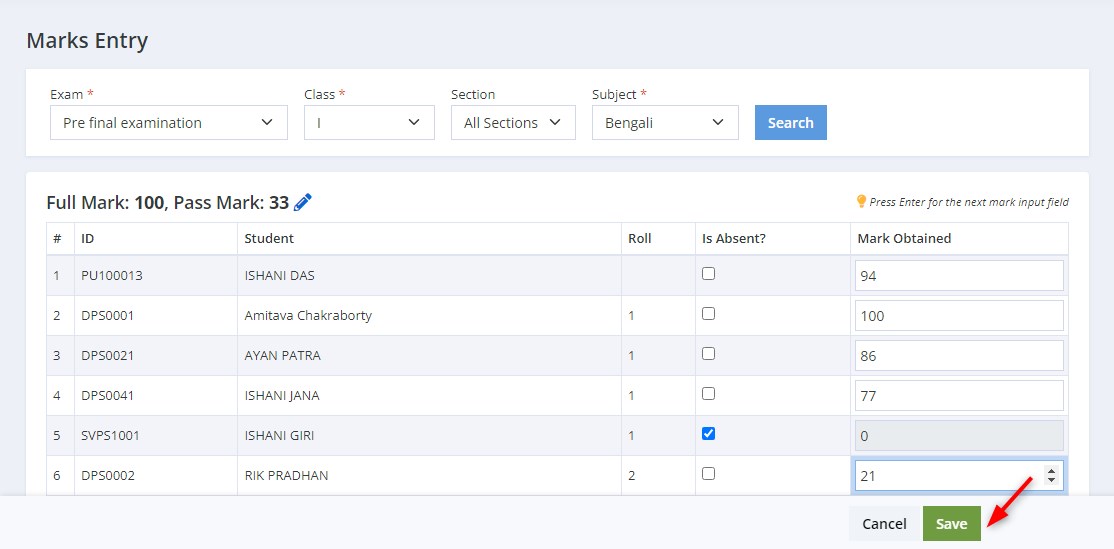
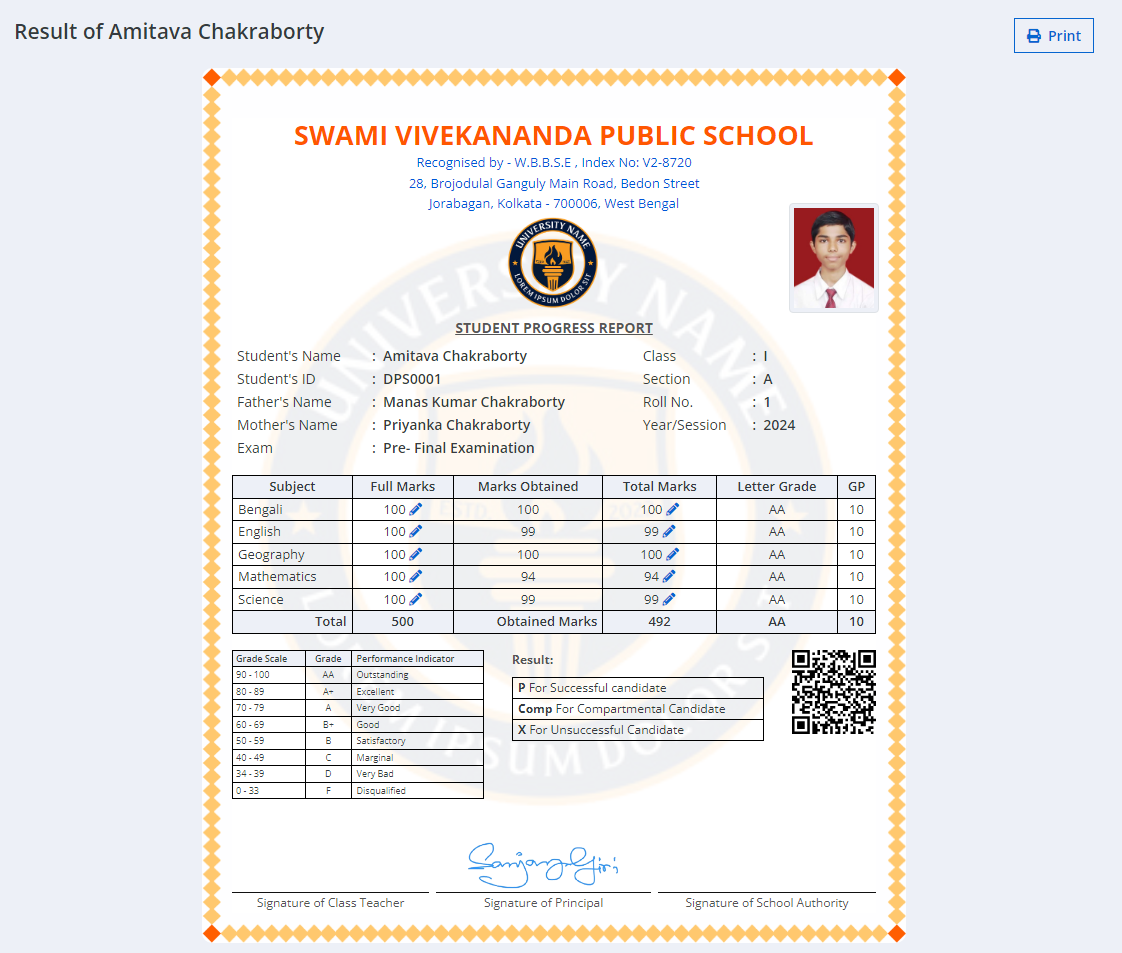
Lastly, you can view/print result.To view/print results, follow the steps:
1. In the side menu bar,click on Exam Management > Results.

2. Now, select Marksheet > Class and click on Filter.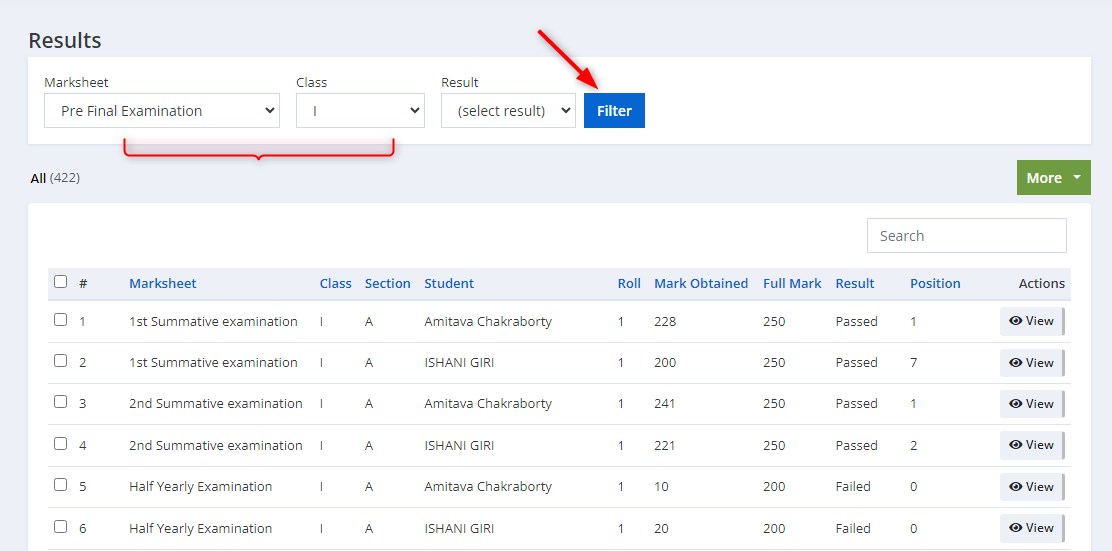
The "Result" drop-down box shown in the image allows users to filter records based on specific result categories such as failed, passed and promoted.Once a selection is made, clicking the "Filter" button will display results based on the selected category.
3. The results appears. Click on View to see any of the student's marksheet.

4. Now you have a clear view of the student's marksheet. Click on Print option on the top right corner to print the marksheet.