To connect Biometric Device with Classunify School ERP, follow the steps given below:
PART 1: Setup Computer / Server (Device #1)
1 Open Start Menu and type 'cmd'. Right-click and select 'Run as Administrator'.
2 Type 'ipconfig' and press Enter.
3 Note down the IPv4 Address (Example: 192.168.0.1).
4 Press Windows + R, type 'ncpa.cpl', and press Enter.
5 Select active connection (Ethernet/Wi-Fi), right-click and choose Properties.
6 Select Internet Protocol Version 4 (TCP/IPv4) and click Properties.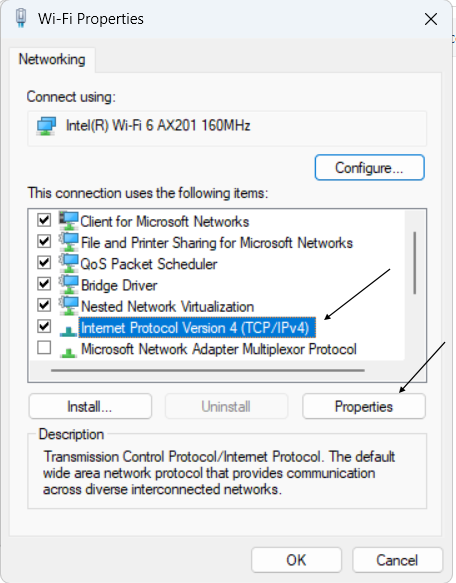
7 Click on 'Use the following IP address' and enter the three IP addresses (as shown in the image below) and put it in the following fields:
IP Address
Subnet Mask
Default Gateway
8 Set Preferred DNS as 8.8.8.8 and Alternate DNS as 8.8.4.4.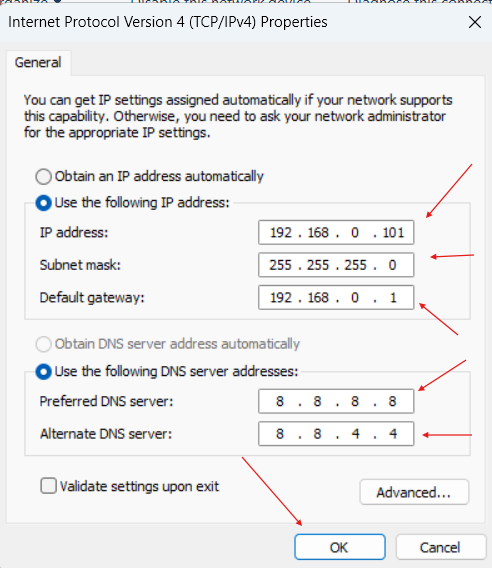
9 Click OK to complete server setup.
PART 2: Install EasyTime Pro Software
1 Open Google and download EasyTime Pro from this url.[click here to download]
2 Download the easyTimePro-x.x.x-win-x64 and start the installation by clicking on Setup.exe.
3 On the following screen, locate the default port number 80 and change it to 8081 and click on Install button.
4 On Google Chrome Browser, on the address bar, type 192.168.0.1:8081 or http://localhost:8081 and click on Enter. The default Username and password is admin.
5 If you have successfully logged in, then the installation of easytimepro software is successful.
PART 3: Setup Biometric Device (Device #2)
1 Go to Menu > COM > Ethernet.
2 Set DHCP to Yes and go back.
3 Navigate to Cloud Server settings.
4 Enter the same IP address obtained from ipconfig (IPv4 Address).
5 Disable or untick HTTP if enabled.
6 Click OK to complete device setup.
Result: The biometric device is successfully connected to the server.